When running a business having your products or brand visible online is important. Having an online visibility is one of the most important thing a business should do to succeed. Most of the business we have right are visible online be it on Social Media Platforms or e-commerce platforms. So running ads is really important if you want to make sure your online presence is secured. So here are simple steps on how to run ads on Facebook.
Facebook is currently one of the world’s most used social media platform so having an ads on this platform is a good to make sure your business have a good exposure. But for simple business owners or content creators who doesn’t have the capacity to hire social media handlers learning how to run ads on your own is important. So take your notes and let’s dive right in.
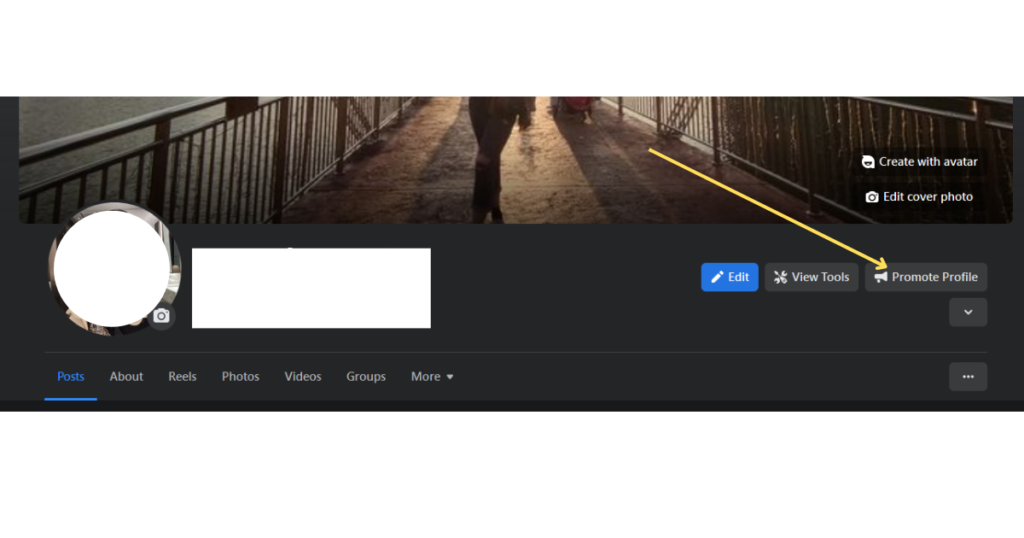
Step 1: On your profile or facebook page scroll on top on you will see the “Promote Profile” button this will show you 2 options
Step 2: You may choose which one you prefer
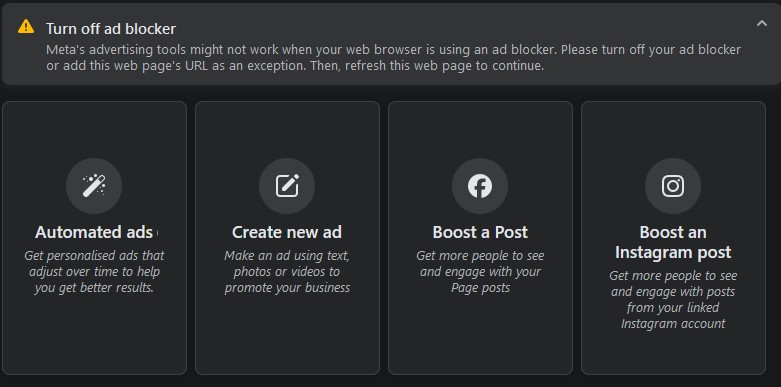
Automated ads: Will ask few questions on what you want to achieve with your ads, and it will automatically set the ads settings.
Create New Ad: This is the most ideal option as it gives you liberty to set demographics, budget on your own.
Boost Post: This type of ad will boost a certain post on your profile
Boost Instagram Post: this option is available if you linked your Instagram page to your Facebook page
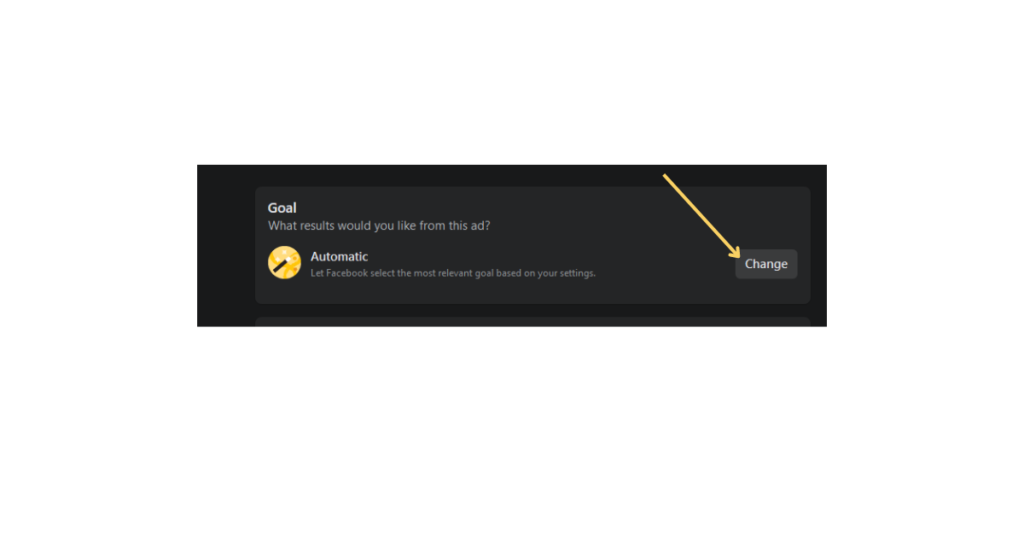
Step 3: If you click New Ad Post, you will see this goal on top, if you don’t want it automated click change
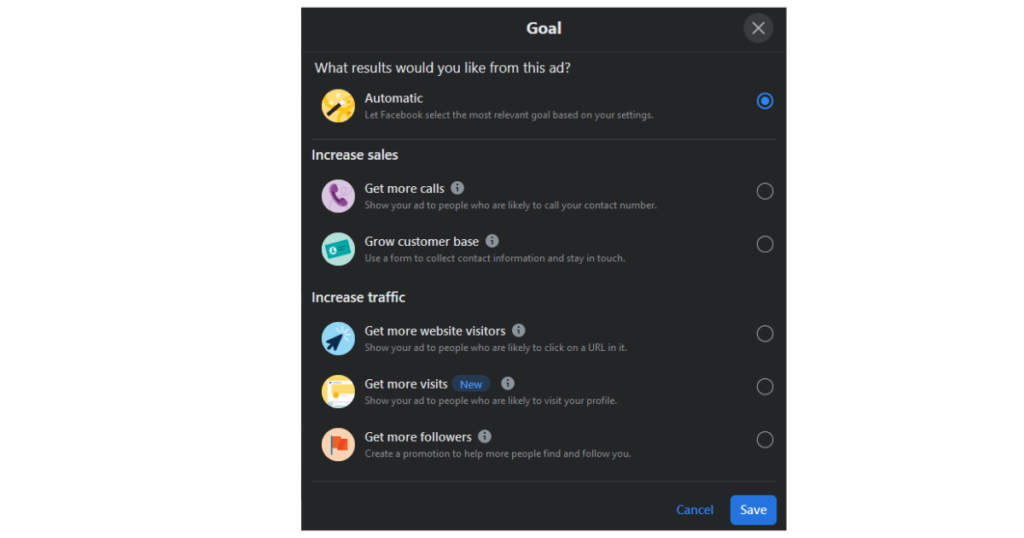
Step 4: Click which goal you prefer, if you have business getting more calls or website visitors are important, but if you are content creator who wants to increase audience you may use get more views or get more followers.
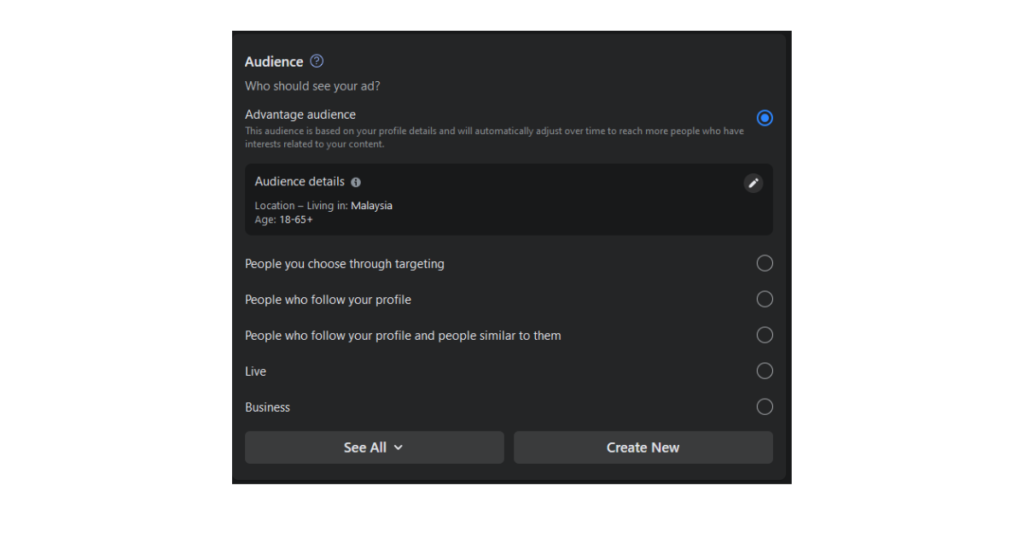
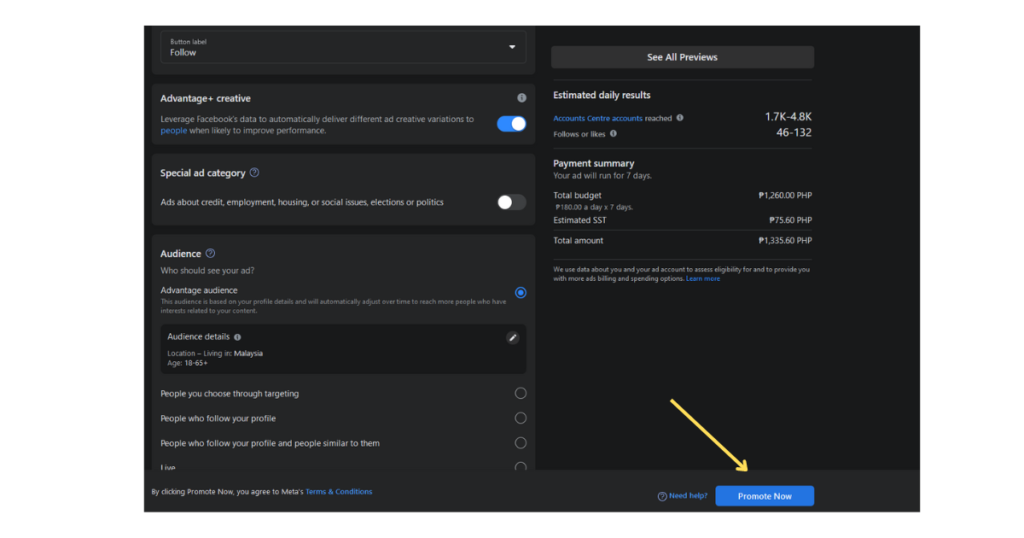
Step 5: Once you have chosen your goal, go to the audience, audience or also called demographics for business terms is the important part of running ads. it is important to adjust the audience manually this will ensure your ads will be shown to the correct audience, if you want women as the main demographic, you may adjust these factors: age, gender, location and interest. For business owners, you must have a clear idea of who and what your audience are.
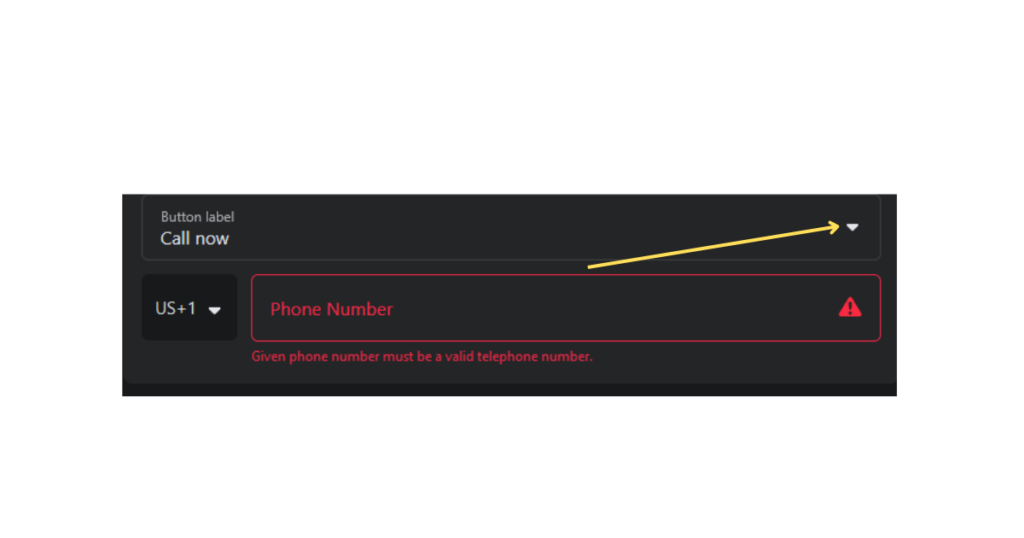
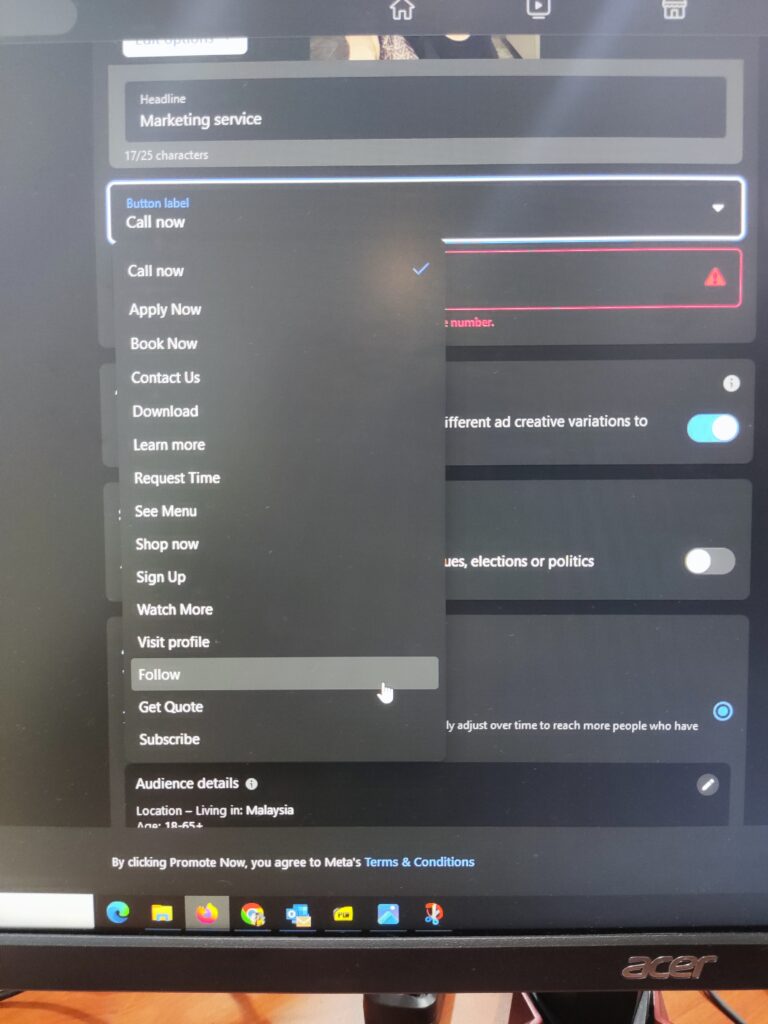
Step 6: Once your demographics are set, hover to this option below this is what you called Call To Action or CTA; one of the most important part of content marketing, this is what you want the audience do once they see you ads. There are different buttons you can choose from. You may also opt not to put button if you only aim is to get more reach.
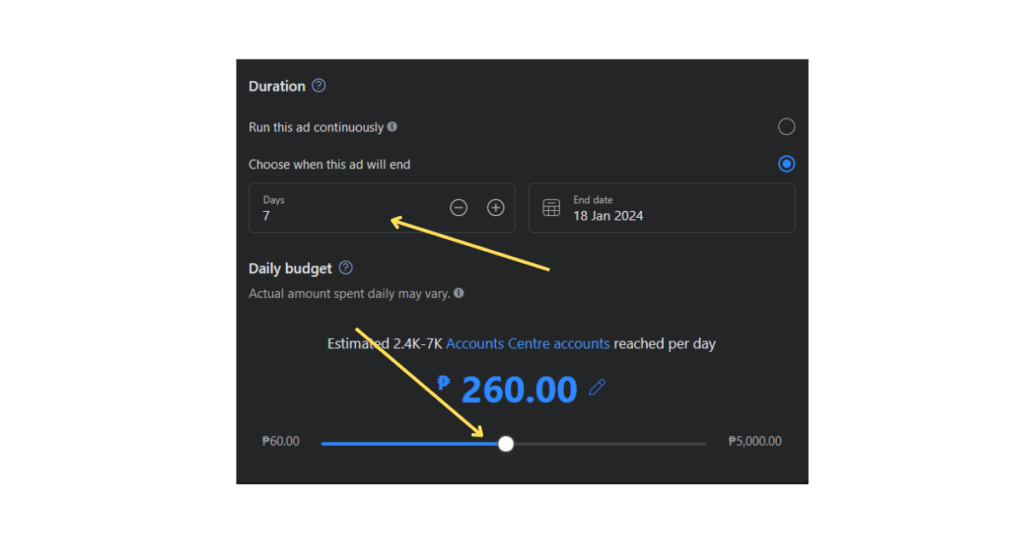
Step 8: Once you set your demographics and CTA button accordingly scroll down you will see the duration and budget, to get the most result set your ads in 4 days, and one more thing to remember the budget listed their is daily! not total so if you have limited budget always make sure to adjust the budget accordingly. The amount listed doesn’t include tax it will only be included once your ad account is already raking ad expenses.
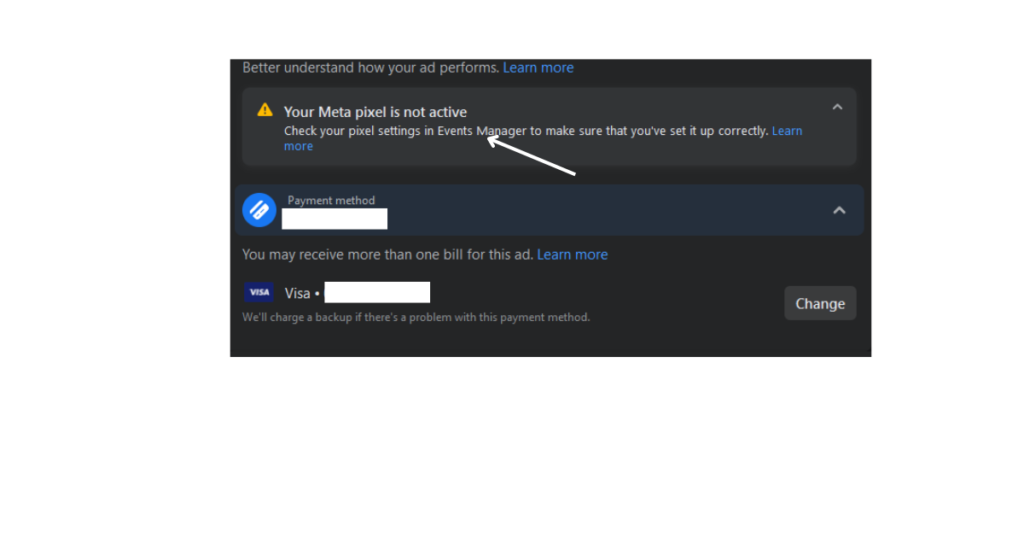
Step 9 (optional): This part is meant for business owners who have website. make sure your website has Meta Pixel, this will help you centralize all analytics and data, which is important for your business. If you want me to teach you how to install Meta Pixel on your site comment it below.
Step 10: Once everything is set click promote now and wait for approval; approval will range from 5 mins to 24hrs. Make sure to check if everything is correct as if you edit you ads it will need to be approved by Meta again.
Special note to remember do make sure you have ad account to run ads (set which region are you in to set currency). All ad accounts is subject to follow the advertising guidelines set by Meta. To check if your content follows the guidelines visit this site: https://www.facebook.com/business/help/488043719226449?id=434838534925385